How To Install & Maintain Your Sim Racing Setup
As the title suggests we will in this post cover all there is about the installation of racing systems from wheelbases to stirring wheels to pedals and gearboxes. We will also discuss drivers, console and pc installation & triple screens.
We will also show you how to make your sim racing system last longer. We will focus on this post on the most sold sim racing products so that you will get the maximum chance of finding what you are looking for.
We will discuss in length these 3 models of wheelbases / stirring wheels / pedals / gearboxes bundles :
- Thrusmaster T150
- Logitech G29
- Fanatec CSL
Bear in mind that the installation process for a Thrustmaster T1T50 is almost identical to that of a T300 and it is the same for the Logitech or Fanatec range of products.
We will also be showing how to install triple screens for sim racing.
Without further due, let’s start.
How To Install The Thrustmaster T150
1 – Unpack it.
You should have in your package: the wheel already installed on its wheelbase. The T150 comes with a 2-pedals set while the T150 pro comes with a 3-pedals set. You can also additionally buy the TH8A which is the gearbox that is recommenced with it. You also get the clamp, the brake mod and the instructions.
2 – Install the brakie mod behind the brake pedals
So below you have the brake mod:
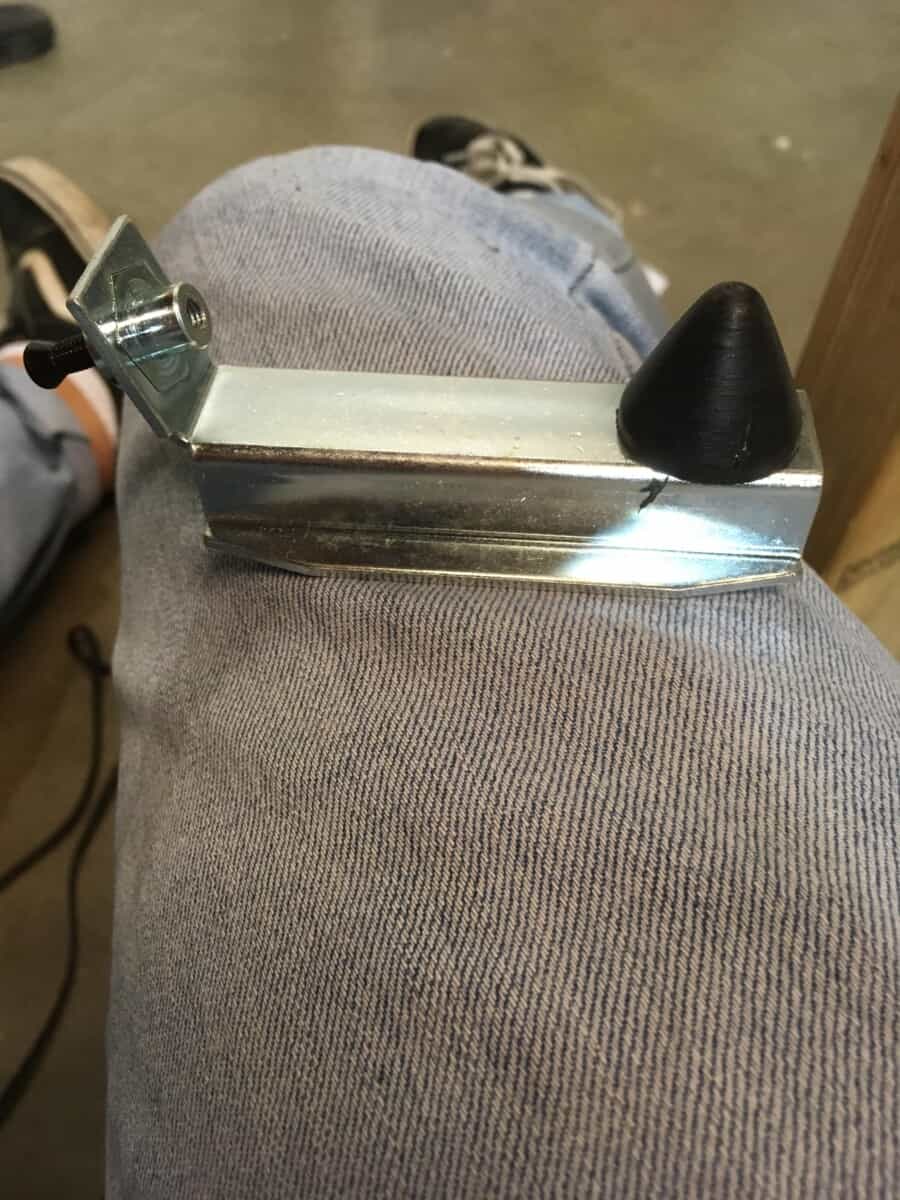
The pyramid-shaped black rubber part comes against the brake pedal and the other side fits inside a threaded hole located just behind the brake pedal on your pedal support. You should then have something like this:
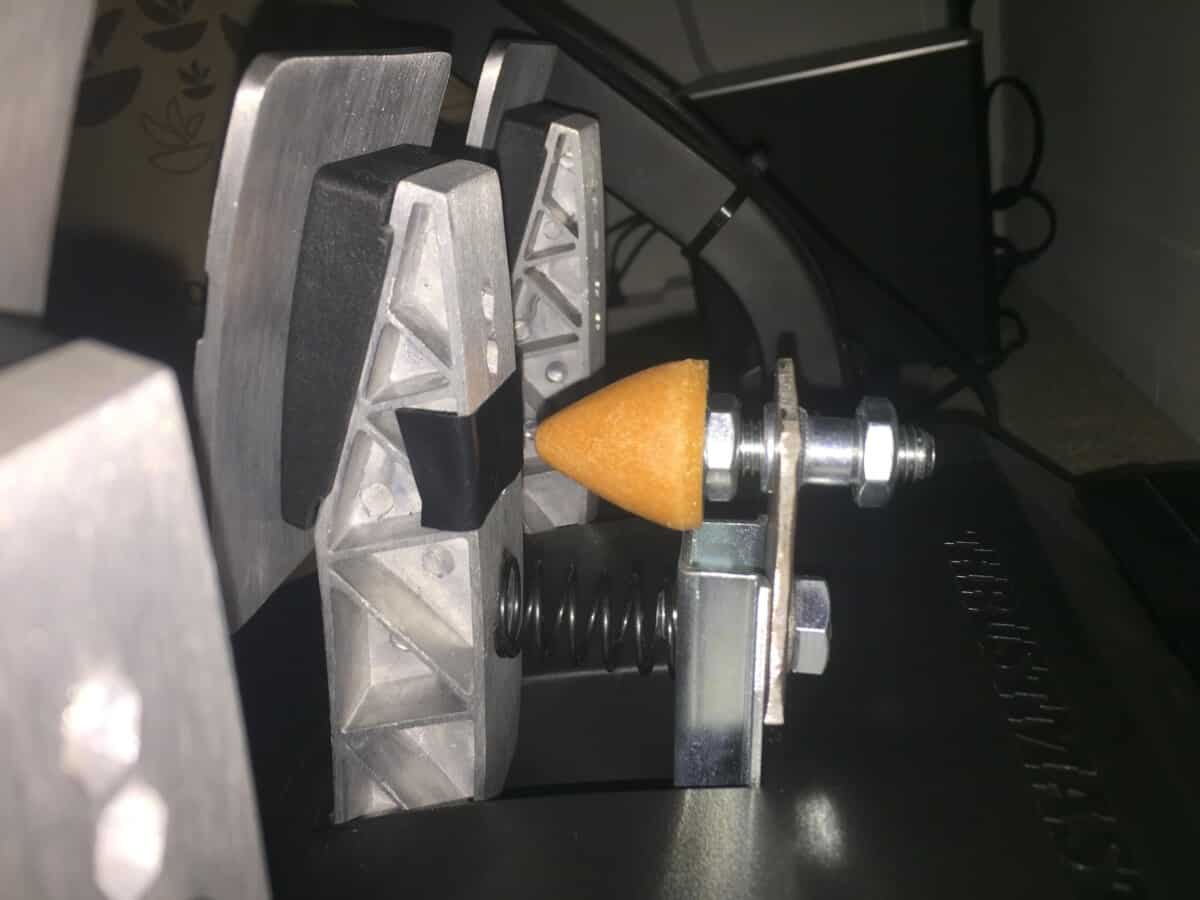
Below the pedal set, you have to insert a screw to fixate the brake mod on the pedal support. You can then adjust the brake mod to fit your feet (pun intended). The brake mod recreates the feel of a real brake pedal.
3 -Install the pedal set on your rig
Either you have a sim racing rig or cockpit, then we recommend you use it and fit the pedals on it, or you don’t have any. If you don’t have one we recommend taking the T3PA Pro as it has more pedals and is made out of metal. It is heavier and can be left on the ground if you are playing only on your gaming chair and desk.
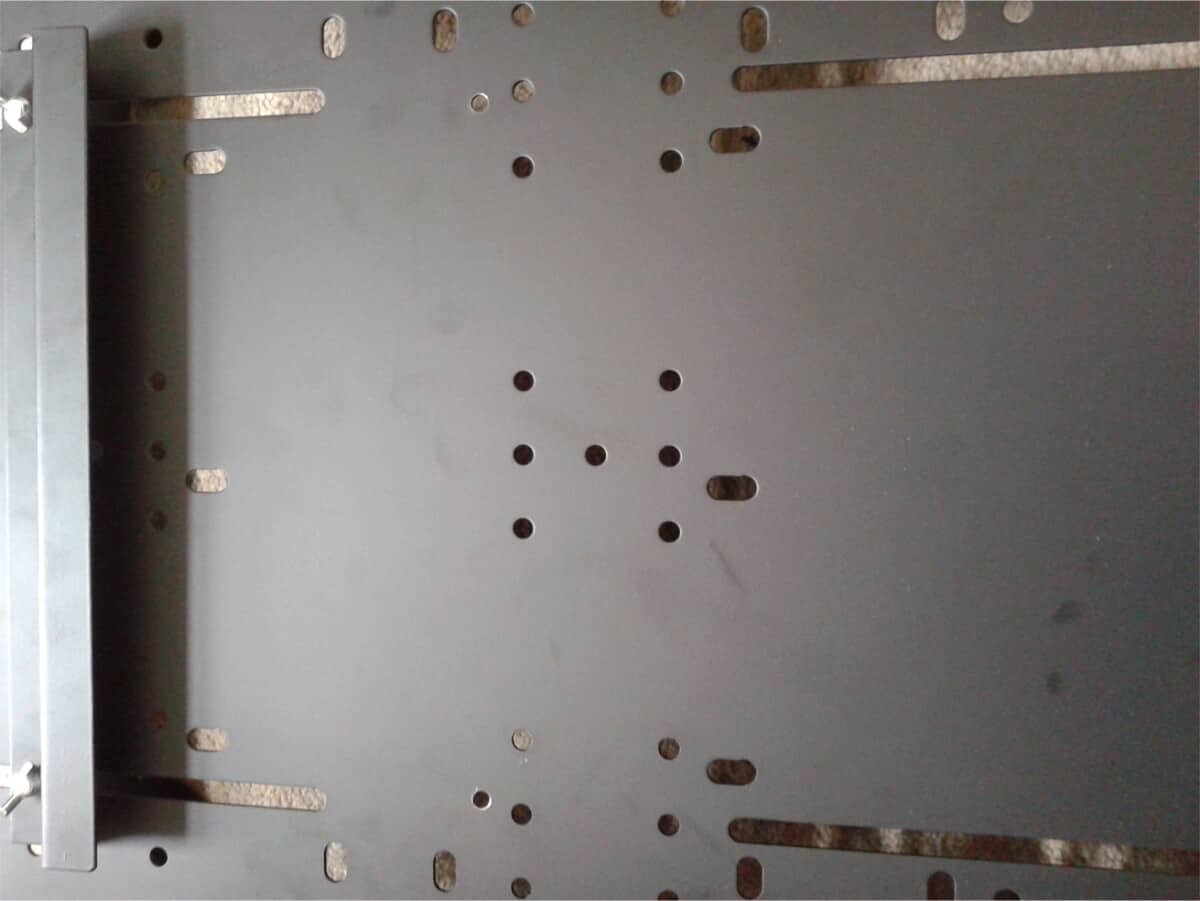
Now, if you have a rig there are plenty of ways to fit the pedals set on it. You should have with your sim racing rig a plate whose sole purpose is to receive the pedal set. It generally looks like this:

On this plate the holes you see are predrilled to receive the most common pedals made by either Logitech, Thrustmaster or Fanatec. You should have a plate like this with your racing rig.
Now, you have to fit the pedals set upon it, fit it against the back stop, screw the set of pedals on the plate. This is quite easy.
Additional tip: pay attention to the cable coming off the set of pedals. You should make it come out from the right side meaning from the side the other elements of your setup are.
4 – Connect the pedals to your wheel base
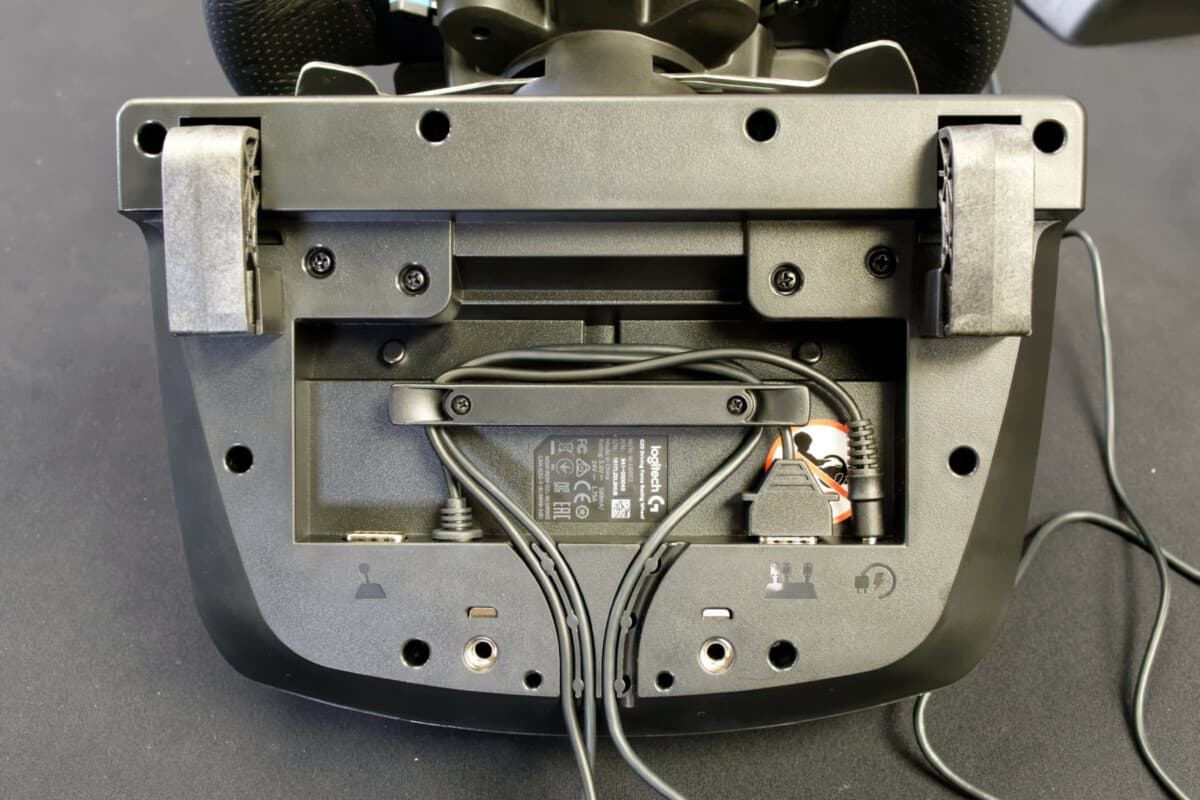
You have 4 cable ports in the back of your wheelbase. There is only one cable coming out of your pedals and it goes in the cable port at the far right when you are looking at your wheelbase from behind.
The cable ports’ positions are different on a Thrustmaster T300 for example but the same cables connect to the wheelbase. The cable ports are just located differently.
6 – Fixate the wheelbase and stirring wheel on the mount table
Whether you have a desktop or a mount table built in your racing rig, you have to fixate the wheelbase with its stirring wheel on it. The Thrustmaster wheels come with threads and washers that are used to screw the wheelbase on racing rigs’ mount table. This is done in the same manner as the pedal set explained earlier.
You make the threads go through the holes of the mount table then through the washers then through the holes located underneath the wheelbase.
As for the pedal set plate, most racing rigs’ mount tables are predrilled to receive big brands such as Logitec, Thrustmaster and Fanatec.
7 – Connect your shifter
Within the Thrustmaster brand, there is the TH8A shifter. You might not have it but we cover the installation process just in case.
When you unpack the package it contains :
- A shifter knob
- USB cable
- Din cable
- Screws & Allen key
- Sequential shifter plate
- Instruction manual
You first start by mounting the knob on the shifter. You just need to turn it in a clockwise direction.
On console, you will need to connect the shifter to the wheelbase with the DIN cable whereas you need to use the USB cable on PC.
8 – Connect your wheel base to power
On the back of the T150 , you can see 2 cables connected to the back of the wheelbase. The one on the right is the power cable whereas the other one is the cable for PC/Console connection.
For now connect the wheebase to power but DO NOT CONNECT IT TO PC YET.
Ten you will need to manage software and drivers if you are on PC, but more on that in a minute.
9 – Software Installation
On Console you have nothing to do. For PC, everything is explained here.
This link contains the user manual for the wheel as well as all the drivers needed for the installation.
First, download and install the drivers. Once the driver is installed for your wheel you should get a message saying: “Please connect all the Thrustmaster product you want to install”
This is when you need to connect the wheelbase to PC with the USB cable.
10 – Connection the wheelbase to PC
You connect the wheelbase to PC via the USB cable (second cable from left when looking at the wheelbase from behind). Then the wheel will start to turn by itself.
Then your computer will detect your wheel and ask for a restart before you can use it. And then you should be good to go.
11 – Start playing day and night
How To Install The Logitech G29
1 – Unpack it.
You should have in your package: the wheel already installed in its wheelbase. The G29 comes with a high-quality 3-pedals pedal set. You can also additionally buy the Logitech H shifter which is the gearbox that is recommenced with it. You also get a sector cable for electric power and the instructions.
The G29 is easier to setup than the Thrustmaster T150 or T300. The pedals already come with an installed and already calibrated brake pedal.
2 -Install the pedal set on your rig
Either you have a sim racing rig or cockpit, then we recommend you use it and fit the pedals on it, or you don’t have any. If you don’t have one it should not be an issue as the G29’s pedal set is quite heavy. It can be left on the ground if you are playing only on your chair and desk.
Now, if you have a rig there are plenty of ways to fit the pedals set on it. You should have with your sim racing rig a plate whose sole purpose is to receive the pedal set. It generally looks like this:
On this plate, the holes you see are predrilled to receive the most common pedals made by either Logitech, Thrustmaster or Fanatec. You should have a plate like this with your racing rig.
Now, you have to fit the pedal set upon it, fit it against the backstop, screw the pedal set on the plate. This is quite easy.
Additional tip: pay attention to the cable coming off the pedal set. You should make it come out from the right side meaning from the side the other elements of your setup are.
3 – Connect the pedals set to your wheel base
You have 4 cable ports in the back of your wheelbase. There is only one cable coming out of your pedals set and it goes in the 3rd cable port from the left when you are looking underneath it.
4 – Fixate the wheelbase and stirring wheel on the mount table or your desk
A big advantage of the G29 compared to the Thrustmaster we covered above is that this part of the installation is much simpler.
Whether you are on a desk or rig mount table you can simply install and fixate the G29 wheelbase by using the clamps designed for this purpose.
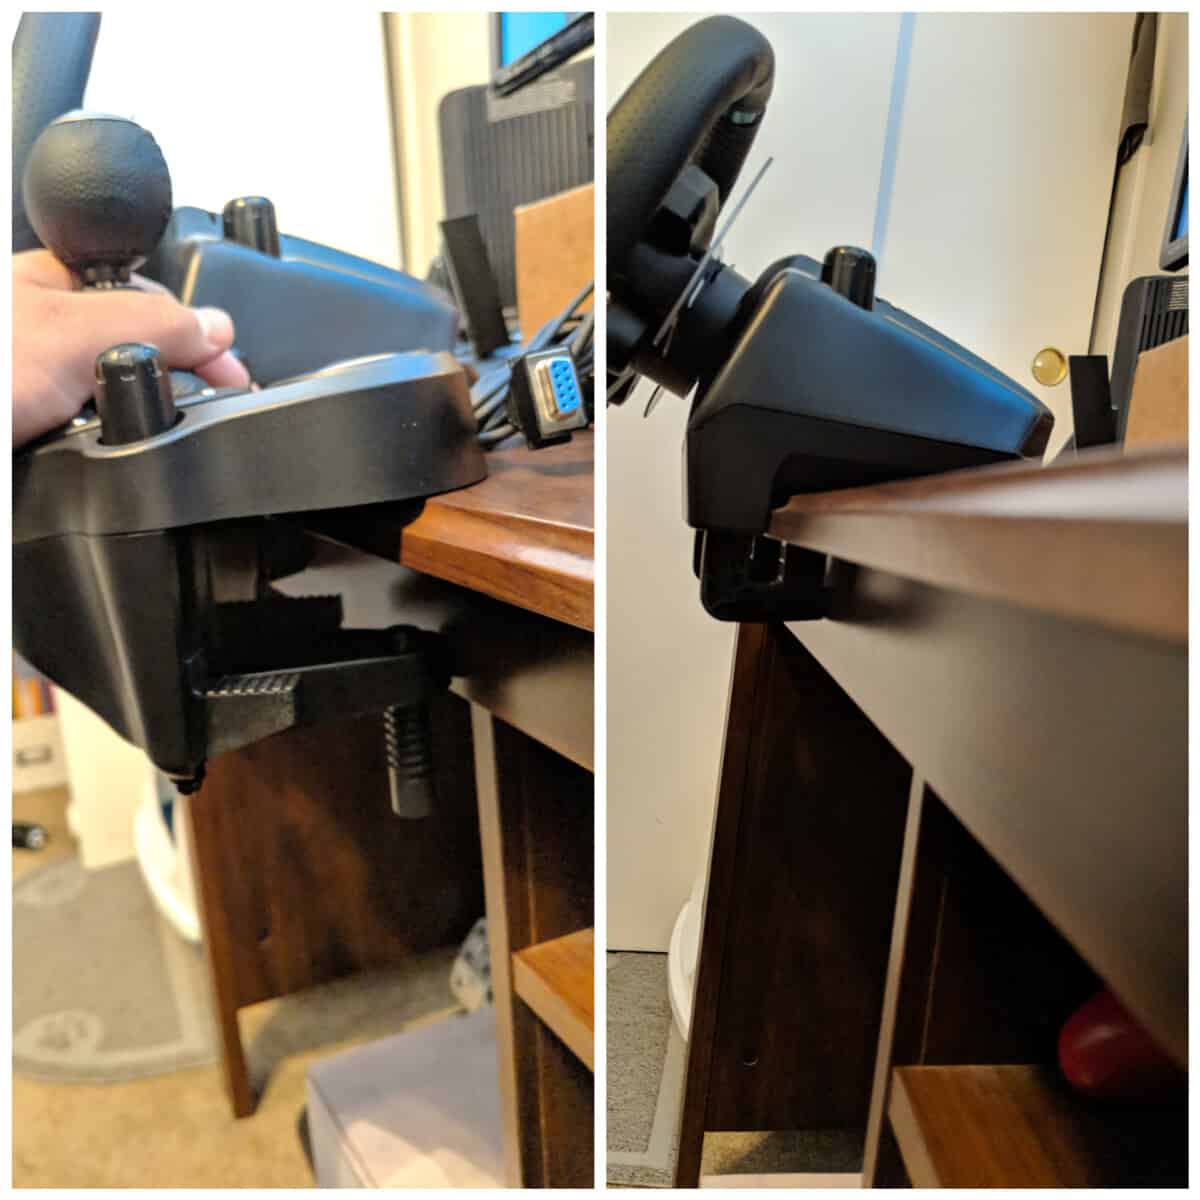
You actually just have to tighten the screw as much as you want to fixate the wheelbase. This is really simple.
5 – Connect your shifter
Again the G29’s shifter can be installed easily compared to the Thrustmaster’s. All you have to do is to connect it to the wheelbase and fixate it on a mountable or desk in the same way you did the steering wheel, with the clamps.
Ten you will need to manage software and drivers if you are on PC, but more on that in a minute.
6 – Connect the wheelbase to power
The cable is the one at the far right when looking below the wheelbase.
7 – Install the PC drivers
First, you will need to download the Logitech G Hub. You can find it here. Once you’ve installed it, it will ask you to connect your Logitech gear.
8 – Connect the wheelbase to PC/Console
The cable is the second one from the left above. The wheel will start turning on its own. The Logitech G Hub will detect the G29.
9 – Start playing day and night
How To Install The Fanatec CSL
1 – Unpack it.
The Fanatec CSL comes in 3 packages: one for the steering wheel, one for the wheelbase and one for the pedals. The pedal set has only 2 pedals as the steering wheel is equipped with shifting paddles making the need for a shifter or clutch unnecessary. You can still buy an additional clutch or shifter if you want.
The packages containing the steering wheel & wheelbase come with: the user manual, a bag, a fixation clamp, a ring, an Allen key, spare buttons, power cable, USB cable, the steering wheel & the wheelbase.
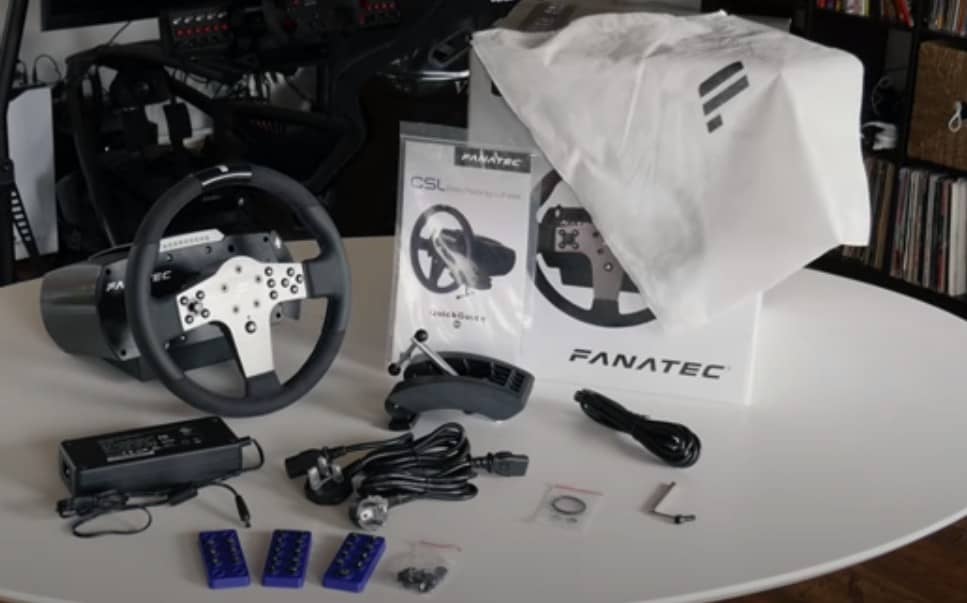
The pedals come with a pedal plate, 2 pedals, 4 screws.
2 – Install the pedals on the pedal plate
Inside the pedals’ package you must have received a plate with holes.
First, put the plate above the pedals. You should have a hole in the pedal coming into position with the one on the plate.
You install 2 bolts per pedals and tighten them with the provided tools. You then connect the pedals to the box under the plate.
You do the same for the other pedal, make sure the brake is on the left. You can then add the long black rubber upon the bolts to improve the look.
3 – Mounting the pedal set on your rig’s pedal plate
As for the Logitech and Thrustmaster, you can mount now your complete pedal set on your rig’s pedal plate. Underneath the set, you have holes, 4, in each corner. You can make a screw go through these holes and fixate the pedals set to your mount.
Generally speaking, mounting plate for pedals on popular rigs have holes that accommodate the Fanatec CSL.
4 – Install your wheelbase on its mount plate or your desk
As we saw above the Fanatec CSL wheelbase comes with a clamp. This clamp is what fixate the wheelbase to your support.

5 – Connect the pedals set to the wheelbase
You just take the cable coming out of the little black box underneath your pedal set and connect it to the wheelbase to the 3rd port from the left.
6 – Connect the power and USB cable to the wheelbase for PC/Console connection
7 – Turn the wheelbase on
8 – Update your drivers (before mounting the wheel on the base)
9 – Attach the stirring wheel to the wheelbase
You just mount the steering wheel on the base by sliding it. Then there is just one screw to add on the rotative base to secure the steering wheel on the base.
10 – Start playing day and night
How to Install your triple screen for sim racing
Before installing your three screens there are a few things you need to be aware of.
You first need to choose the size of the monitors you want. We personally recommend reasonably sized screens placed close to you. Bigger screen means that they will be placed further away from you, you need more space in front of you and more importantly, you put more strain on your video card because it has to deliver more pixels.
So first, make sure you have not too big screens that you can place at roughly 50 cm (20 in).
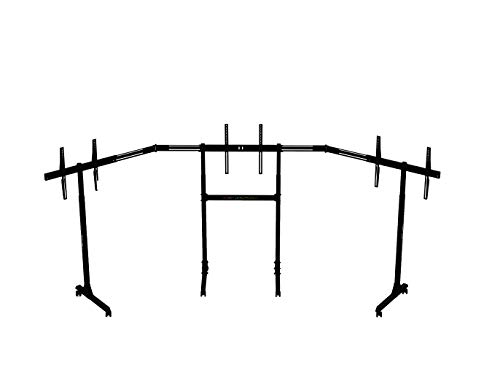
1 – Install your triple screen holder behind you rig
You will need to buy a holder like the GT Omega Racing holder or put your screens on your desk.
2 – Fixate screens on your holder, or just put them on your desk
3 – Plug the screens to computer
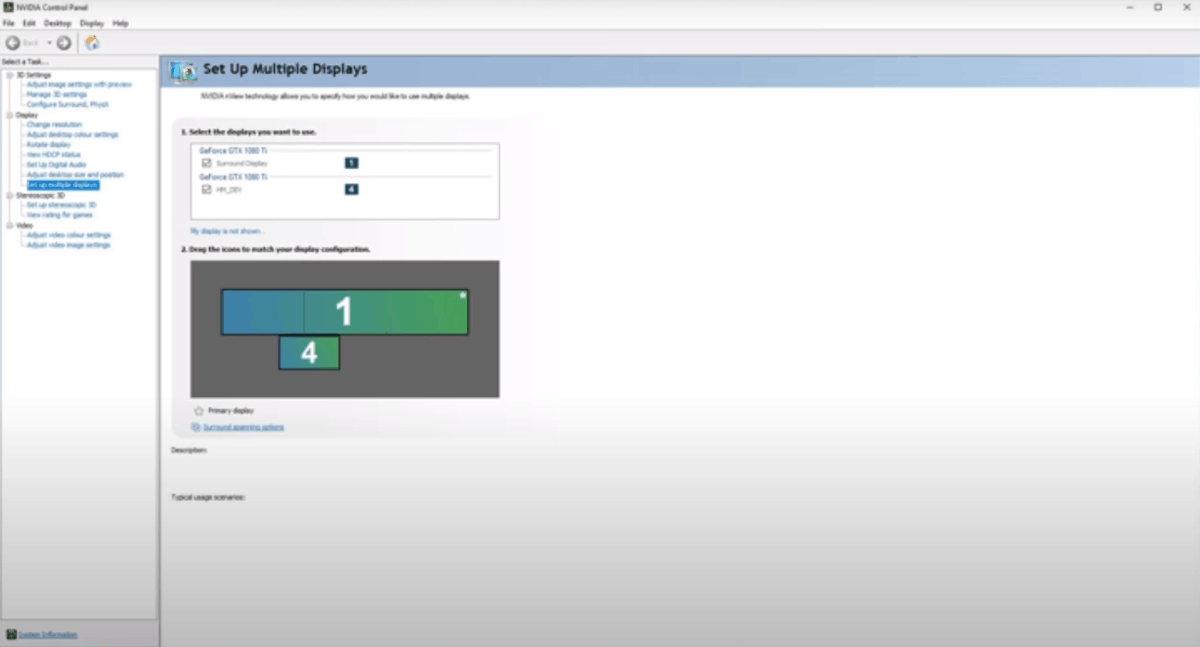
4 – Modify your video card’s parameters
You need to go to your video card’s parameters and go into the “Surround” section if you have an Nvidia, or “Iffinity” if you have an ATI. For Nvidia users, go to “Set Up Multiple Displays” tab. Check that all your screens are recognized and in the correct orientation. Next, you need to go to the Configure Surround, PhysX tab and click on the configure button.